This is Part III from my previous blogs on utilizing the Dynamics GP PSTL. The two previous blogs addressed the System and Financial sections of the PSTL. The PSTL is a tool within Microsoft Dynamics GP that allows us to perform various tasks against the company such as copying, merging, modifying, etc. against the Dynamics GP data. The user should be logged in as the ‘sa’ user to perform these functions and should have knowledge on what they would like to modify and the overall effect on their system. In this blog, I wanted to discuss the seven Purchasing tools listed under the Purchasing Tools grid: 1099 Modifier, PM Master Trigger, PM Minimum Check, Select Checks Combiner, Vendor Combiner, Vendor Modifier, and Vendor Name Modifier.
To access the PSTL tools, the tools must be installed for Dynamics GP and a shortcut created on the Navigation pane of the Dynamics GP desktop. The PSTL software is located on the Dynamics GP installation disk.
To create the shortcut to PSTL:
- Right click in the Dynamics GP Navigation Pane
- Select Add
- Add Window
- Type the Name of the Shortcut and window
- Expand the Technical Service Tools option
- Expand the Project option
- Select Professional Services Tools Library
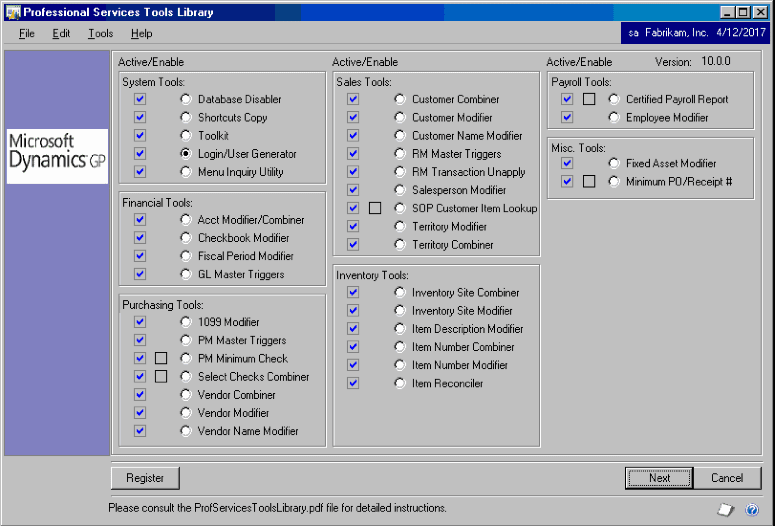
Purchasing Tools: When running any PSTL tool, always remember to make a backup before performing the action.
1099 Modifier– This tool enables the user to update 1099 amounts for vendors that are not set up as a 1099 vendor in Dynamics GP under the Options tab of the Vendor Maintenance Screen.
To Modify 1099 amounts:
- Change the vendor(s) to a 1099 vendor under the Options tab of the Vendor Maintenance Screen
- Start the PSTL function in Dynamics GP
- Select the 1099 Modifier option
- Click Next
- Select To Print Report if you want to view the changes only or Process and Print Report to view and make the changes to the vendor
- Select the Calendar Year to affect
- Click Process
PM Master trigger – This tool enables the user to replicate added vendor and address information to multiple databases. This feature is also available for Accounts and Customers.
To replicate vendor information:
- Start the PSTL function in Dynamics GP
- Select the PM Master Trigger option
- Click Next
- Select the Master Database to replicate From
- Select the Database to replicate To
- Select the table type to replicate
- Click OK
- Click OK
PM Minimum Check – This tool enables the user to utilize the minimum check feature in Dynamics GP.
To utilize the PM Minimum Check feature:
- Start the PSTL function in Dynamics GP
- Select the PM Minimum Check checkbox
- Close the window
- When using the minimum check amount
- From the Select Check window in Dynamics GP
- Select Additional
- Select Set Minimum Check Amount
- Select the check box to activate the minimum check
- Enter the minimum check amount
Select Checks Combiner – This tool enables the user to automatically consolidate checks for the same vendor when vouchers are appending to an existing batch.
To replicate vendor information:
- Start the PSTL function in Dynamics GP
- Select the Select Checks Combiner option
- Close the Window
Vendor Combiner – This tool enables the user to combine vendors together. This tool affects all open and historical data.
To combine Vendors:
- Start the PSTL function in Dynamics GP
- Select the Vendor Combiner option
- Click Next
- Enter Vendor to combine and remove the Starting Vendor ID
- Enter the New Vendor number to combine into
- Click Convert
- Click OK
To update a range of Vendor Names via a spreadsheet:
- Create a spreadsheet
- Enter existing Vendor ID to combine and replace in the first column
- Enter the new Vendor ID to combine into in the second column
- Save as a text file
- Start the PSTL function in Dynamics GP
- Select the Vendor Name Modifier option
- Click Next
- Select the Import option
- Select the Validate button
- Select the spreadsheet text file
- Select Open
- If no errors, Select the Modify button
- Select the spreadsheet text file
Vendor Modifier – This tool enables the user to change the Vendor ID for an existing vendor.
To Modify the Vendor ID:
- Start the PSTL function in Dynamics GP
- Select the Vendor Modifier option
- Click Next
- Enter Vendor ID to change and remove in the Starting Vendor ID
- Enter the New Vendor number in the New Vendor ID field
- Click Convert
- Click OK
To update a range of Vendor IDs via a spreadsheet:
- Create a spreadsheet
- Enter existing Vendor ID in the first column
- Enter the new Vendor ID in the second column
- Save as a text file
- Start the PSTL function in Dynamics GP
- Select the Vendor Name Modifier option
- Click Next
- Select the Import option
- Select the Validate button
- Select the spreadsheet text file
- Select Open
- If no errors, Select the Modify button
- Select the spreadsheet text file
Vendor Name Modifier – This tool enables the user to change the Vendor Name for an existing vendor.
To Modify the Vendor ID:
- Start the PSTL function in Dynamics GP
- Select the Vendor Name Modifier option
- Click Next
- Enter Vendor ID to change the name for
- Enter the New Vendor name in the New Vendor Name field
- Click Convert
- Click OK
To update a range of Vendor Names via a spreadsheet:
- Create a spreadsheet
- Enter existing Vendor ID in the first column
- Enter the new Vendor Name in the second column
- Save as a text file
- Start the PSTL function in Dynamics GP
- Select the Vendor Name Modifier option
- Click Next
- Select the Import option
- Select the Validate button
- Select the spreadsheet text file
- Select Open
- If no errors, Select the Modify button
- Select the spreadsheet text file
ANDREW FRASER | Senior Business Software Consultant
As a Senior Business Consultant, Andrew is responsible for the implementation and support of CRM, GP, and other Microsoft products, ensuring that our solution scoping, architecting, and delivery meet and exceed customer expectations. He helps clients analyze their current business processes and provide them with process improvements. During his time at KTL, Andrew has built lasting relationships with clients by understanding their business needs and provided value by leveraging their existing resources. Andrew has more than 21 years of experience in implementing business software for a variety of industries, including service, government, distribution, not-for-profit and manufacturing. He graduated with a Bachelor’s Degree in Math with concentration in Computer Science and a Bachelor’s Degree in Business Marketing from St. Andrew’s University in Laurinburg, North Carolina. His experience includes helping companies embrace technology to fulfill their organizational needs and creating innovative solutions using CRM, GP and other Microsoft products.