
Microsoft Dynamics GP can be customized in number of ways. In this blog I am going to cover GP Forms customization using Modifier and VBA code.
Modification Basics
To modify an existing form, we need to do 2 basic steps.
Step 1 – Modify the GUI of the form, it may involve adding new fields, deleting fields, changing format or layout, etc.
Step 2 – Modify the logic of the form, maybe the way it fetches data or perform actions
Step 1 is achieved by Modifier and Step 2 is implemented using VBA.
What is a GP Modifier?
Modifier is a tool which assists in customizing GP Forms and Windows. Modifier is limited in what it can do when it comes to customization. But when paired with VBA, it can take care of most of the customization needs. Broadly speaking it allows the following customizations:
- Modify GP Forms and Windows (layout, show/hide fields, change the order of Tab, etc)
- Make a global interface change (change a global string so that the change is seen across the system)
- Add new fields, delete fields, move them around
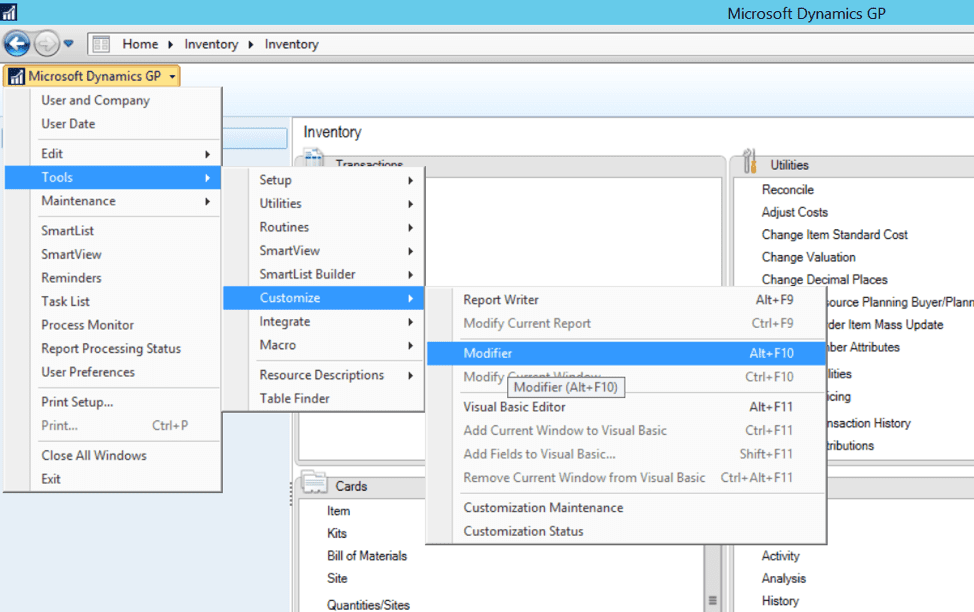
How to start the Modifier?
There are 2 ways to launch the Modifier
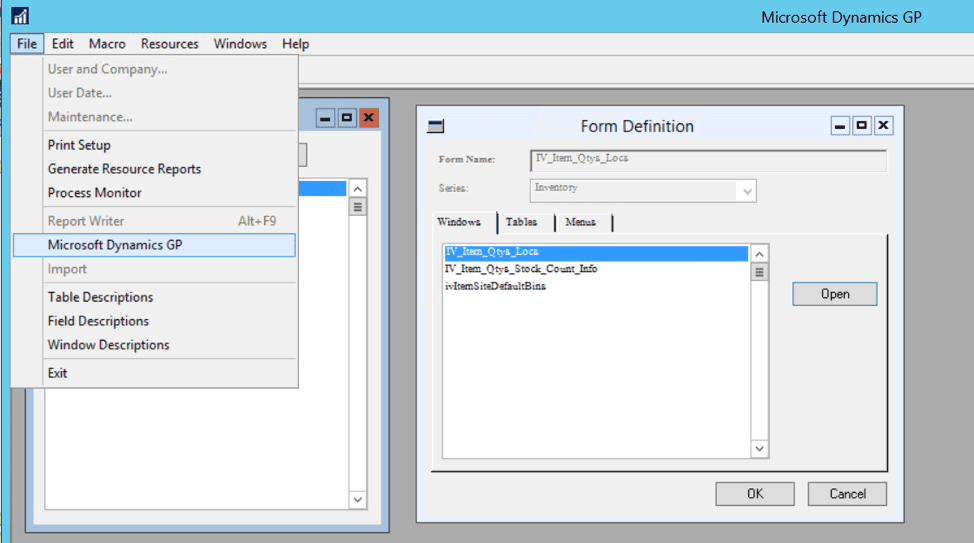
Microsoft Dynamics GP menu, choose Tools >> Customize >> Modifier
And here is how the modifier looks:
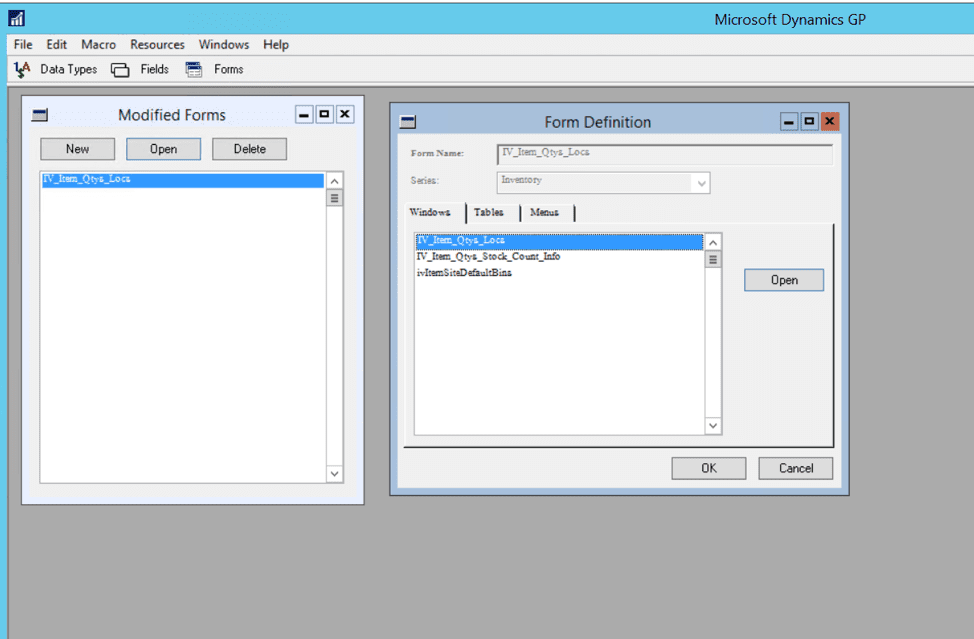
‘Modified Forms’ show a list of Forms that have been already modified. If you click ‘Open’ then another window opens with Form Definition. A GP Form is a collection of Windows, tables and menus.
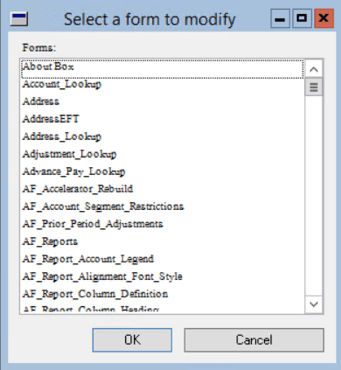
If you click ‘new’ then you see a list of forms that you can pick for modifications. There is also an option to Delete modifications.
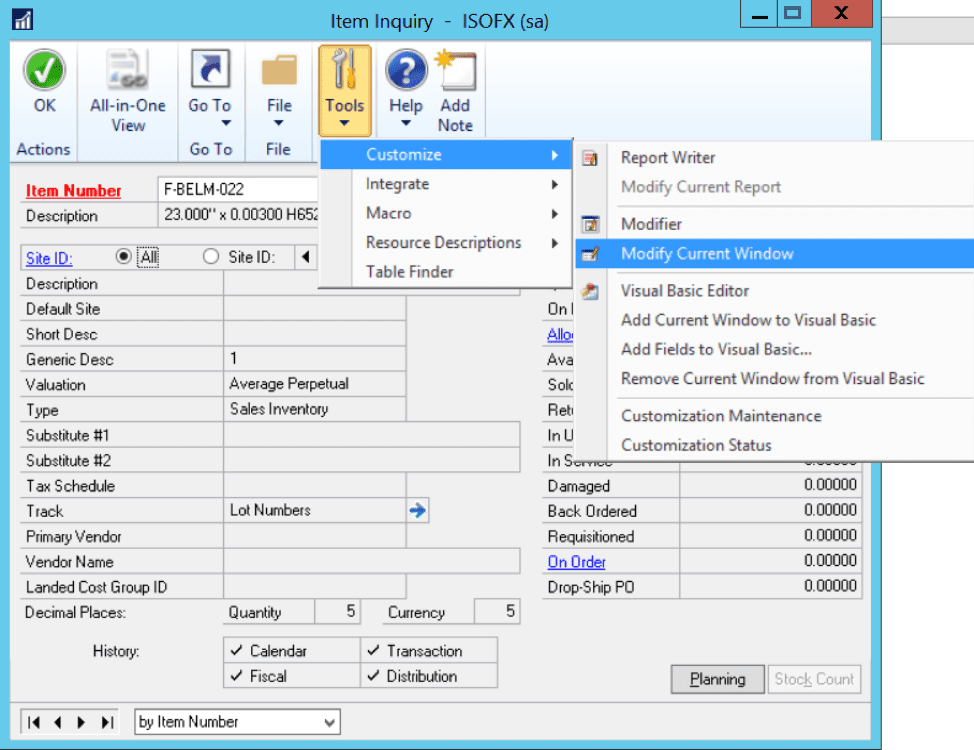
Another way to launch Modifier is from the individual task window.
Tools menu, choose Customize >> Modifier
This option will take you directly to the modifier with the current window opened in Modifier.
To go back to GP, File >> Microsoft Dynamics GP
Can’t see the Modifier? Read on.
If the Modifier option is greyed out, then it means you either have to run the installation or you do not have access to the Modifier. You can refer to Microsoft Dynamics GP installation Guide for more information on how to install Modifier.
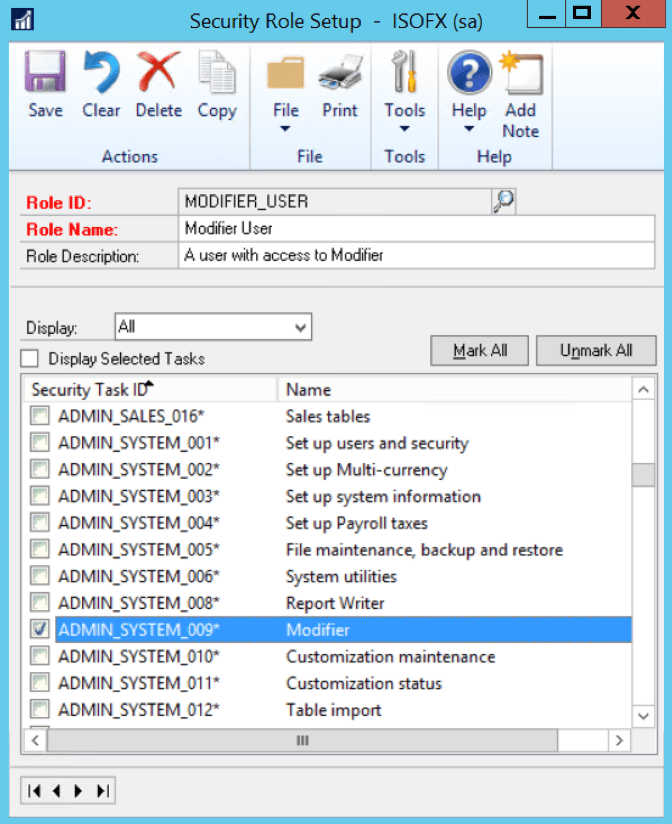
There is a predefined security task ADMIN_SYSTEM_009 for Microsoft Dynamics GP to control which users will be able to access the Modifier. Assign this security task to an existing role to grant access to the Modifier for users assigned to that role. It is probably a good idea to create a new security role for the Modifier.
How to Add New Fields to Existing Forms
After some brief introduction to Modifier, let’s use it to add new fields to an existing Form.
As an example, I am going to show how you can add a text box to an Item Inquiry Window.
Inventory >> Inquiry >> Item
Tools -> Customize -> Modify Current Window
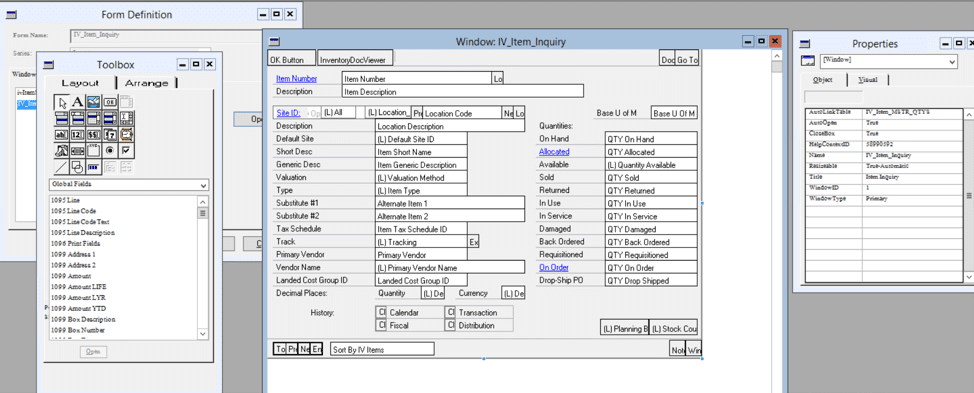
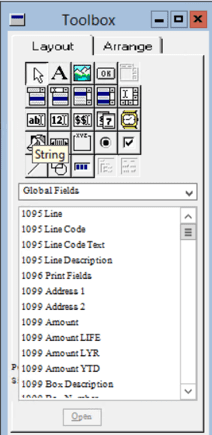
There is a Toolbox with various option to be dragged and dropped on the Form. Properties windows will show properties of the selected object.
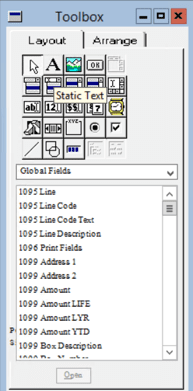
Let’s add a new label and a textbox on the form and call it ‘QA Status.’ Use Static Text tool for the label.
Next drop a tool ‘String’ next to the QAStatus label.
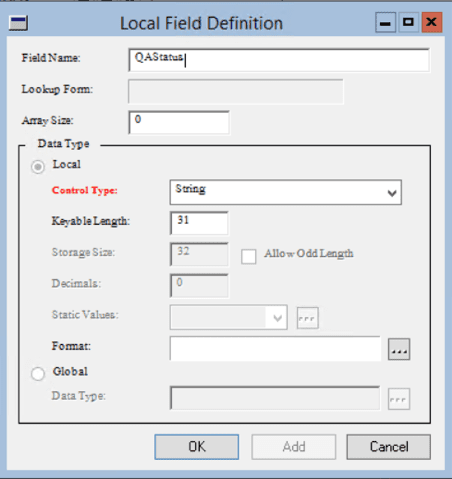
Next go to Properties of the textbox and change the name to ‘QA Status.’ Even trivial things like this can be confusing if you are new to the Modifier. To change the name, go to Properties, Field and double click to open Local Field Definition window. Here you can change the Field name, Type, etc.
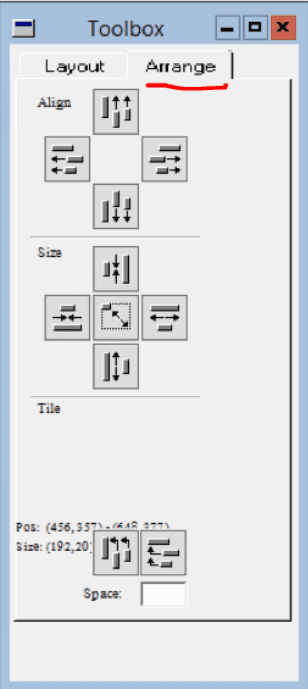
The new field is going to be completely out of whack and not aligned. You can try and adjust the field length, height and position using your mouse pointer, but it is will never be perfect. Instead, Modifier provides a tool to adjust alignment of controls. On the toolbox, switch to ‘Arrange’ tab and there you will find controls to Align and Re-size controls.
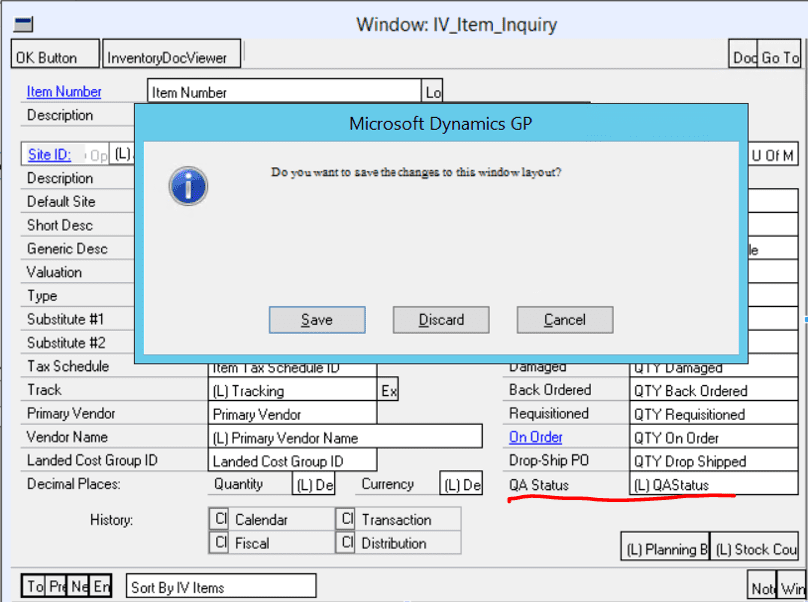
Our new field is now ready. Another little caveat is that the changes will not be saved until the form is closed or you go back to GP. User is prompted with a message saying, “do you want to save changes?”
Where Did the New Field Go?
After saving the changes, let’s go and see the new field in the item inquiry window.
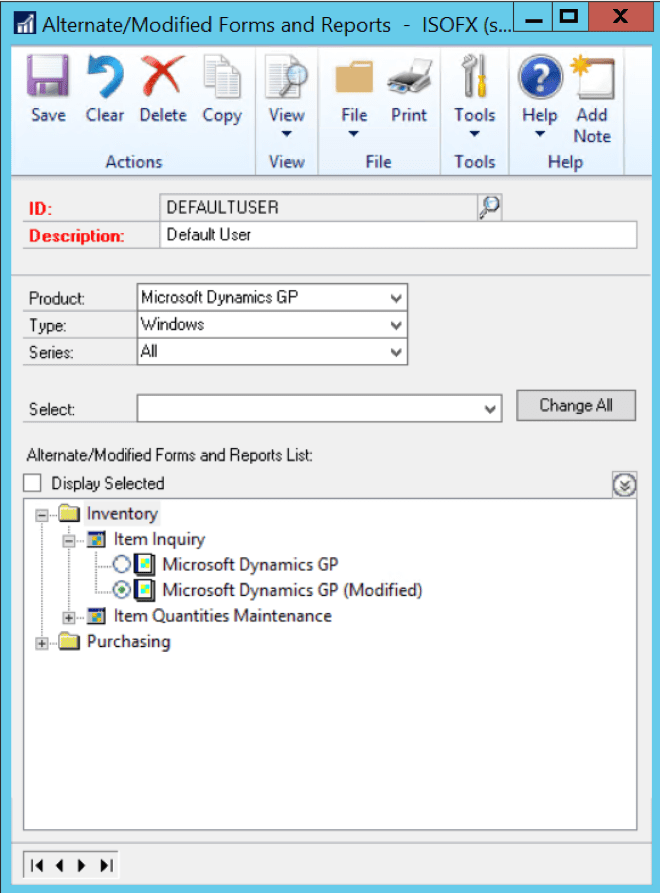
Inventory >> Inquiry >> Item, enter an item number. You will see that the new field is still not visible– where did it go? This is because GP is still using the in-built item inquiry form, and you have to let GP know to use the new modified form. To do this, you must use the Alternate/Modified Forms and Reports window in Microsoft Dynamics GP to grant access. To open this window, choose
Microsoft Dynamics GP menu >> Tools >> Setup >> System >> Alternate/Modified Forms and Reports.
Choose Default User, Product as Microsoft Dynamics GP, Type as Windows and the bottom grid will be populated with all the modified forms. Pick Item Inquiry and select ‘Microsoft Dynamics GP(Modified)’.
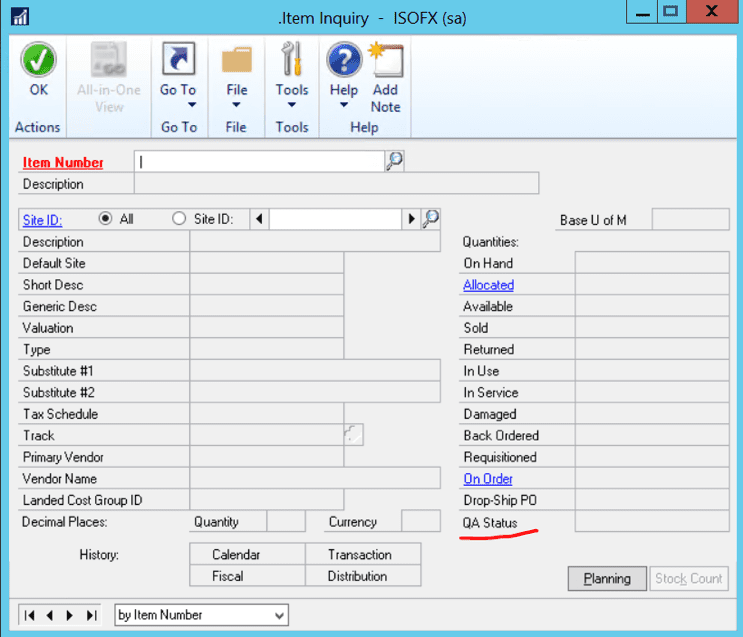
Now when you browse to Item Inquiry window, you will see the new field QA Status. It is still a stationary label with an empty textbox, and we need to put some logic to populate it. This is done using VBA code.
Also note that the Title of the Window has a ‘.’ (dot) in front of it which indicates that it has been modified by the Modifier and that GP is displaying a Modified Form.
Modifier’s Best Companion: VBA Editor
Visual Basic Editor is used for building and maintaining a VBA project. Once you register the Modifier, the Visual Basic Editor becomes accessible though the Tools submenu of the Microsoft Dynamics GP menu. To create or edit VBA code, you must have appropriate user privileges. Typically, this means being part of the Administrators group
Microsoft Dynamics GP >> Tools >> Customize >> Visual Basics Editor
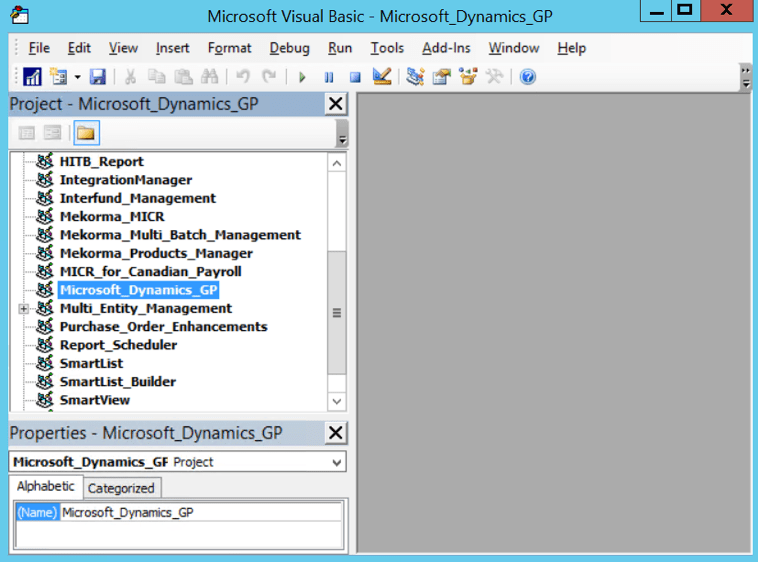
The Visual Basic Editor stores customizations in a project file. The first time you open the Visual Basic Editor, the runtime engine automatically creates a new empty project file that is named based on the current dictionary. For example, the VBA project created for Microsoft Dynamics GP is DYNAMICS.VBA.
First time you open VBA, Microsoft_Dynamics_GP Project is empty.
To add custom logic to the new field that we created above, we need to do 3 things
1. Add Window to Visual Basic
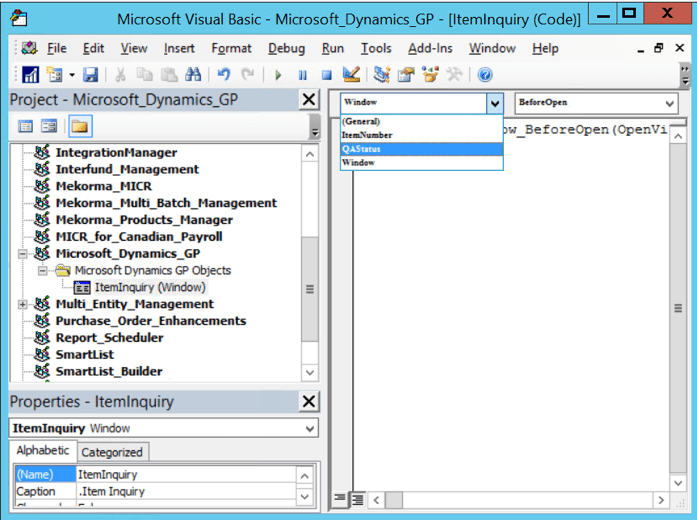
Open Item Inquiry window and browse to Tools -> Customize -> Add Current Window to Visual Basics. Switch to the Visual Basic Editor and display the Project Explorer. It should look similar to the following:
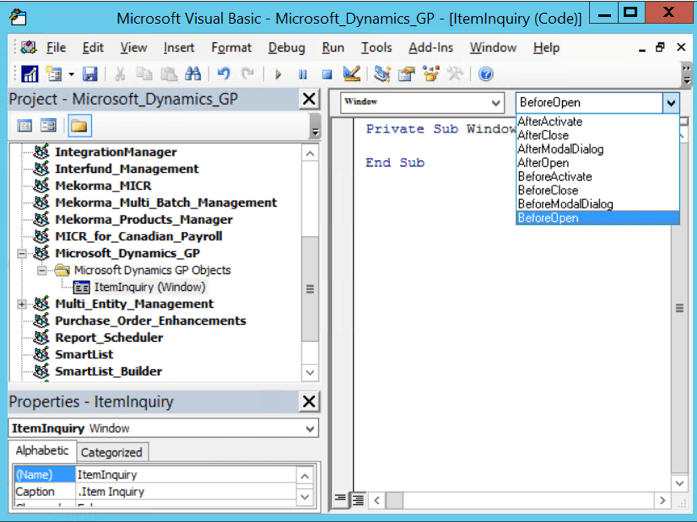
Item Inquiry Window is now available with related events.
2. Add the required fields to Visual Basic
Open Item Inquiry window and browse to Tools -> Customize -> Add Fields To Visual Basics
The cursor changes to a special character, simply tap on the fields that you want to make available in VBA. Item Number and QA Status is now available in the VBA code dropdown.
3. Open Visual Basics Editor and code it up
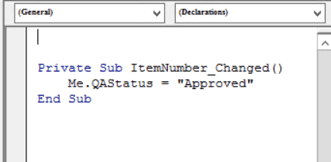
Open item Inquiry Window and see QA Status as “Approved.”

Note that the title of the Item Inquiry window has ‘.’ (dot) in front of it and it ends with a ‘.’(dot). Dot in the front indicates that it is been modified by a Modifier and Dot in the end means that there is VBA code for this Window.
Need More Help?
KTL Solutions is here for all of your Microsoft Dynamics GP needs. As a gold-certified partner, we have the knowledge you need to customize Dynamics GP to suit your needs. Don’t let your technology hold your business back.
Get in touch with us today for more information on Microsoft Dynamics GP. One of our Business Consultants will be in touch with you quickly.