
Written by Jessy Schroeder- D365 Functional Consultant
The Schedule Board in Microsoft Dynamics 365 Field Service is one of the most powerful tools available to dispatchers and resource managers. It provides a visual view of resources, bookings, work orders, and scheduling activities. This allows teams to make informed decisions more quickly.
One of the most effective ways to improve dispatcher productivity is by color coding and adding icons to Schedule Board booking cards. Clear visual cues help users identify booking statuses, priorities, resource types, and exceptions at a glance. As a result, dispatchers spend less time interpreting scheduling information.
Booking Statuses
The related Booking Status record in the Resources section controls the color and icon displayed on a booking card in the Schedule Board. You can assign a unique color and icon to each Booking Status value.
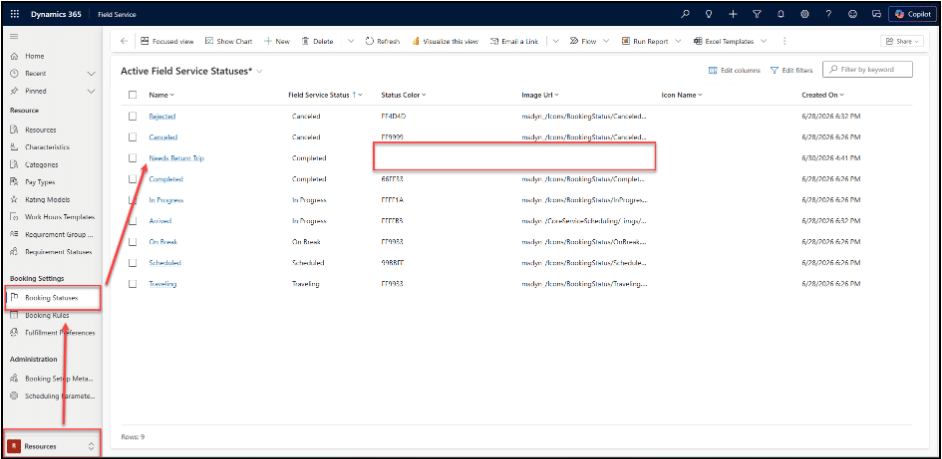
In this example, we created a new Booking Status that technicians can use when updating booking records. This status, called “Return Trip Needed,” identifies a booking where the technician completed work at the site for the day but needs to return to finish the job. This may happen because they ran out of time, need additional parts, or discovered a new issue. At this point, the new status does not have a color or icon assigned.
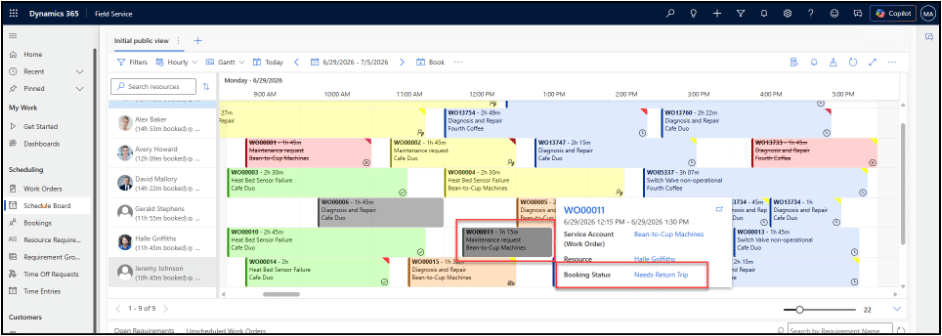
Without these values, booking cards that use this status appear as dark gray cards with no icon in the bottom-right corner.
Customizing Booking Colors and Icons
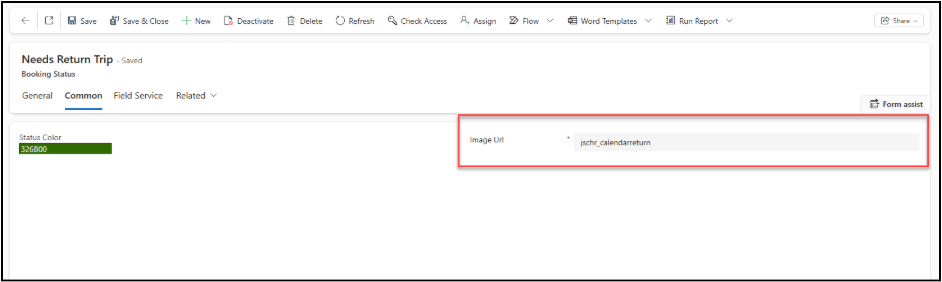
To add or update the color or icon for a Booking Status value, navigate to Resources > Booking Status and select the desired Booking Status record. Use the Common tab on the Booking Status form to configure the Status Color and Image URL fields.
For the color, either enter a HEX color value manually or use the built-in color picker. After you select a color, the field displays a preview.
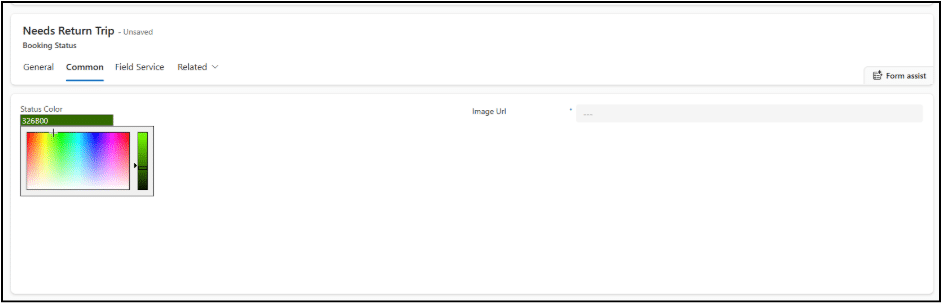
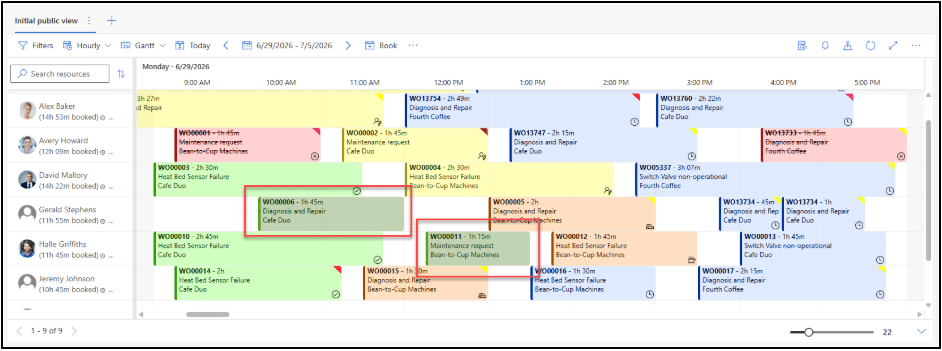
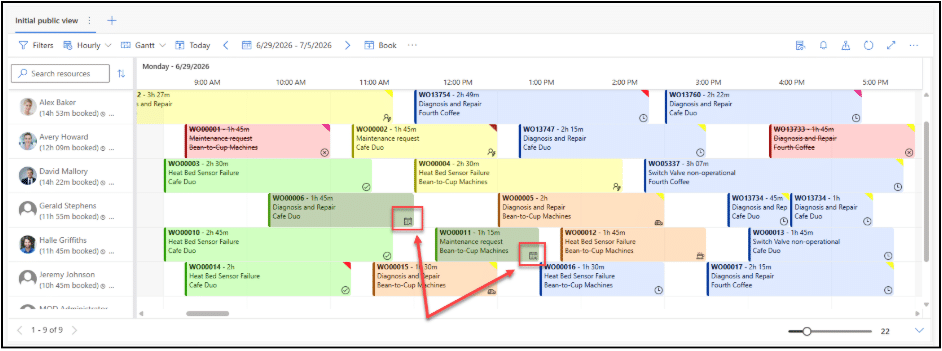
In this example, we selected a darker green than the color used for standard Completed bookings. This helps dispatchers recognize that the booking is complete for now but still requires additional attention.
Once you select the color, save the Booking Status record. Then navigate to the Schedule Board, or refresh the browser tab if it is already open, and review the changes.
To update the icon for a Booking Status value, enter a value in the Image URL field on the status record. The Image URL must reference a Web Resource that already exists in a published solution within the current environment.
You can reuse an icon that Microsoft provides or upload a custom icon for your organization.
To upload a new icon, navigate to the Power Platform Maker Portal (make.powerapps.com) with administrator privileges. Open the desired solution and select Add New > More > Web Resource.
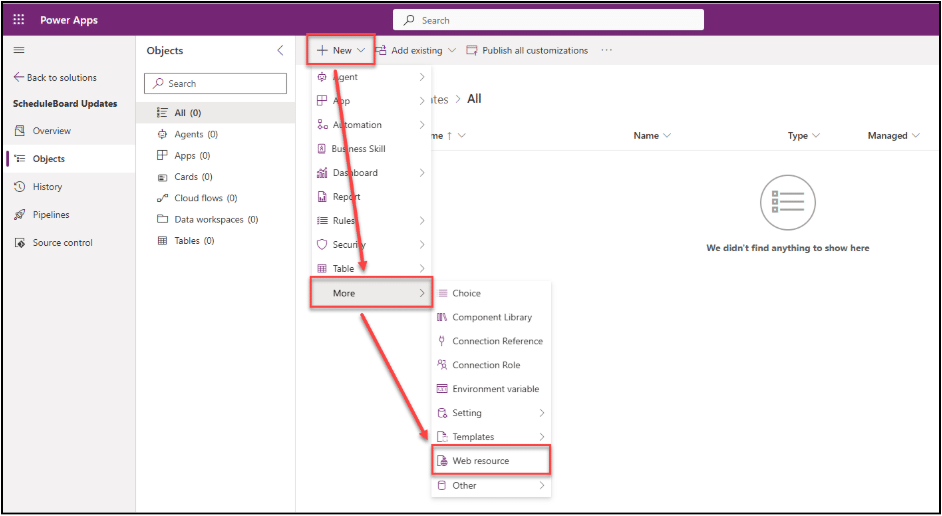
Upload the image you want to use, preferably a small SVG file. Update the Display Name and Name schema if needed, then select Save. After saving, publish the solution by selecting Publish All Customizations.
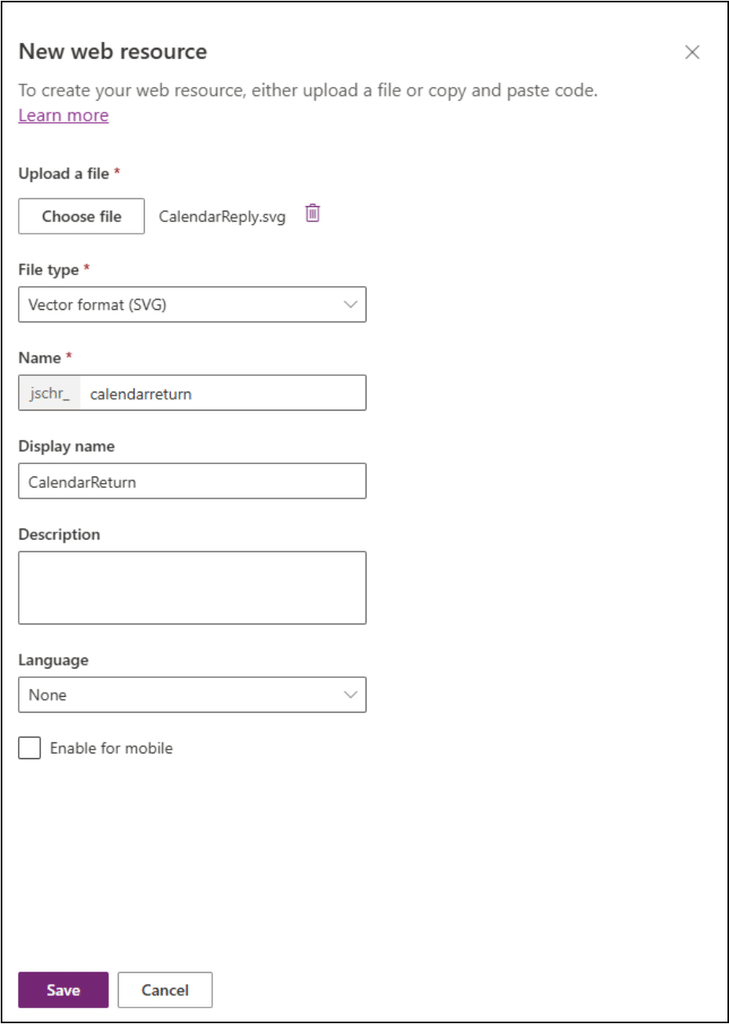
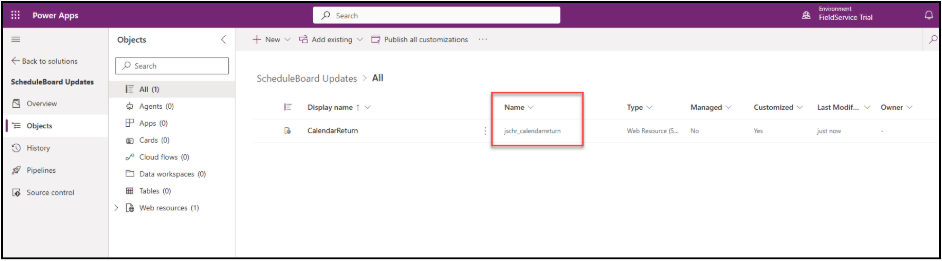
Take note of the full Name of the selected icon. Copy that value into the Image URL field on the Booking Status record and save the record.
Return to the Schedule Board and refresh the browser tab if necessary. You should now see the updated icon on booking cards that use that Booking Status.
Additional Notes
When designing Schedule Board visualizations, keep these recommendations in mind:
- Keep color meanings consistent.
- Avoid using too many different colors. Too many colors can make the Schedule Board look busy and harder to read.
- Use consistent meanings across the application. For example, green can indicate success while red can indicate an issue.
- Consider users with color blindness or other visual impairments when selecting colors. Some users may have difficulty distinguishing between similar colors.