
For Part III of this series, I will demonstrate how PayFabric’s hosted page functions can be used to have all credit card entry handled by PayFabric using their pre-made payment and wallet pages. Using PayFabric’s hosted pages is an easy way to get a custom eCommerce solution up very quickly with maximum PCI compliance and the least amount of coding effort.
Hosted pages allow you to use pre-defined themes which can be created on the PayFabric dashboard. Each theme has two text fields, one for a custom CSS script, and another for custom Javascript code with JQuery support. The use of themes is optional regarding API but will be necessary to control what fields are shown.
The tradeoff with using the custom hosted pages is that certain customizations and behaviors may be limited. If your payment entry requires additional custom input fields, uses a very different HTML layout, or specific input limitation behavior, then it will be necessary to weigh the effort required to do this using pre-set javascript of the theme. Another limitation to consider is that is it not possible to use server side technologies, such as ASP.NET, to programmatically alter parts of generated HTML and Javascript.
PayFabric has two types of hosted pages, a Payment page, and a Wallet page. The Payment page contains all fields for processing a payment transaction along with the billing address, optional shipping address, and the option of adding or using a saved credit card for the transaction. The Wallet page allows for added or updating saved credit card information.
All hosted pages require a security token to be created from the device id and password. This token must be passed to the hosted page as a URL parameter and is valid for one transaction only. The security token is created using the REST API: “V2/rest/api/token/create” URL suffix which, on success, will return a JSON structure with the “Token” field containing the token. Please see Part I and Part II for details on the device id and code examples on using the PayFabric REST API.
The payment transaction page requires a transaction key which is obtained by the creation of a new payment transaction object using the PayFrabric API. The created transaction will contain the payment amount, currency type, and customer ID. This is different from the transaction examples in Part 1 in which the API calls to both create AND process the transaction as a single operation. For the hosted payment page, only the creation of a transaction is done which, on success, will return a transaction key. The actual processing of the transaction is done by PayFabric when the user clicks the process transaction button on the hosted page.
In its simplest form, this is the url: https://sandbox.payfabric.com/V2/Web/Transaction/Process?key=@trxkey&token=@token, to launch the hosted page (using the PayFabric sandbox host) where @trxkey is the transaction key, and @token is the security token.
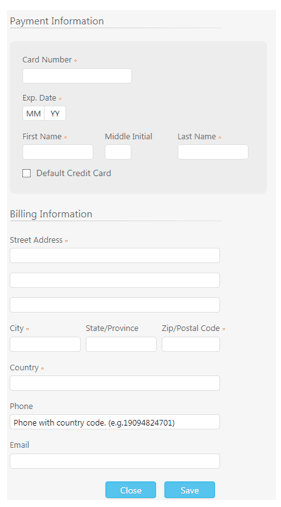
The default payment page appears like this:
In it unmodified form, the page has a number fields, which in most cases, would not be available on a typical eCommerce website, such as the gateway, transaction type, batch, etc. Fields that should not be available to the user will need to hidden by creating a theme in the PayFabric dashboard and setting the necessary CSS and/or javascript to do this. Once a theme is defined, the theme name will need to be passed in the hosted page URL using the “themename” parameter. The PayFabric API documentation for hosted page themes lists all the HTML class and element ID names for customization of the host pages. This is the URL.
Another important URL parameter for hosted pages is the “ReturnUri” parameter. This parameter allows defining a URL that the browser will redirect to after performing the transaction, and includes the transaction response attached in the URL.
The hosted wallet page comes in two variations, one for adding a new stored credit card, and another for updating the information for a prior stored credit card. PayFabric does not have a hosted page to list or delete stored credit cards, but this functionality can be easily coded using the API call to obtain a list of stored credit card ids for a customer, and the API call deletes a stored credit card by id.
In its minimal form, the URL to launch the hosted wallet page for adding stored credit card (using the PayFabric sandbox host) is located here: https://sandbox.payfabric.com/V2/Web/Wallet/Create?customer=@CustomerId&tender=CreditCard&token=@token.
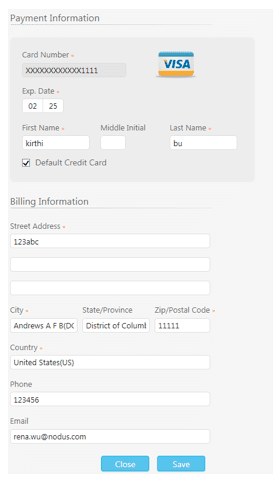
Where @CustomerId is the unique customer Id, and @token is the security token (from the device id and password as described above) good for one transaction. The default wallet creation page appears like this:
In its minimal form, the URL to launch the hosted wallet page to update a stored credit card (using the PayFabric sandbox host) is located here: https://sandbox.payfabric.com/V2/Web/Wallet/edit?card=@cardID&token=@token.
Where @cardID is the stored card Id, and @token is the security token (from the device id and password as described above) good for one transaction. The card IDs for a customer can be obtained using the PayFabric wallet API documented here.
The default wallet creation page appears like this:
Customization of the wallet pages is done in the same manner as with the payment page by creating a theme in the PayFabric dashboard with the desired CSS and javascript and passing the theme name in the “themename” URL parameter. As with the payment page, the PayFabric API documentation for hosted page themes lists all the HTML class and element ID names for customization of the host pages here.
This concludes the series on how PayFabric can be used for creating a custom eCommerce website fast and simple in a PCI compliant manner.
DAVID REED | .Net Developer
David joined KTL solutions in April 2016 and has quickly shifted into the development of custom website applications and eCommerce customizations for Dynamics GP integrations. Prior to KTL, he has over 20 years of professional experience working as a software development consultant in the railroad transportation sector, and in positions at fast paced startup companies, quickly adapting to different technologies and challenging environments. His development background includes web development in C#, T-SQL and Oracle database scripting, and development of complex C# and C++ based windows desktop applications and controls using various specialized APIs such as MAPI and DirectX. David has also worked on projects linking C# development with building automation hardware, electronic sensors, and device controls.


