Written By Jessy Schroeder
If your CRM feels cluttered with unnecessary views, tables, or navigation items, you’re not alone. Learning how to declutter and personalize your CRM app—whether it’s Sales Hub, Field Service, or Customer Service Hub—can make your work faster and more intuitive. In this guide, we’ll walk through how to simplify your Microsoft Dynamics 365 CRM app layout and add custom tables for a more efficient and tailored experience.
Accessing Your CRM App
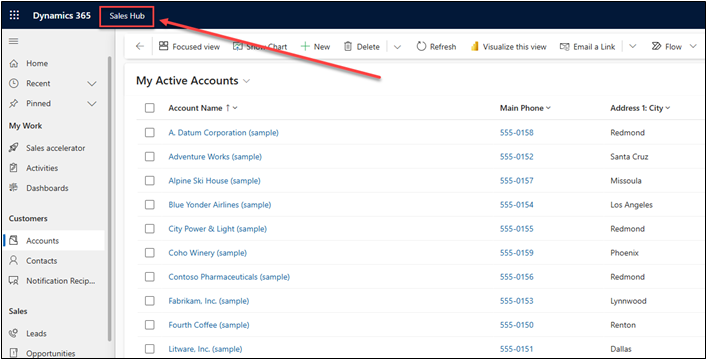
To start customizing, click the name of the app at the top of your CRM environment (for example, Sales Hub or Field Service). This opens a list of all model-driven apps in your CRM.
💡 Tip: System Administrators and Customizers will see all available apps, while other users only see those they have permission to access.
Next, find the app you want to edit, click the ellipsis (…), and choose Open in App Designer. You’ll need admin or customizer privileges for this option.
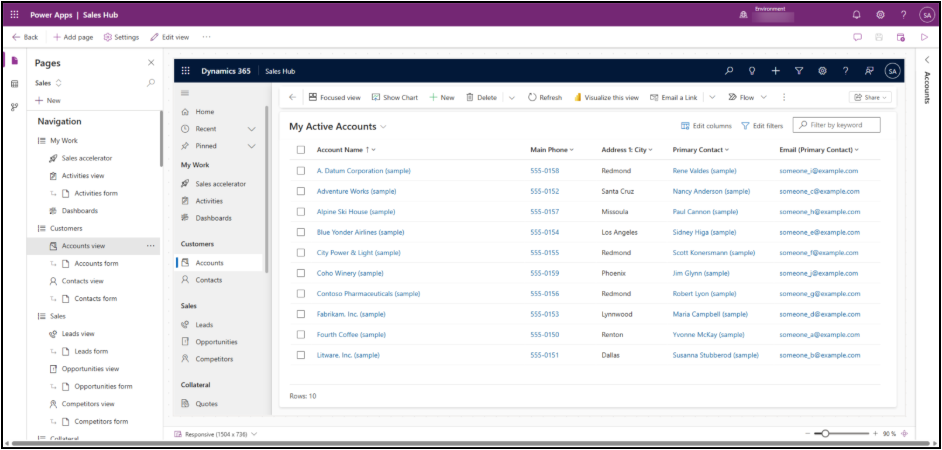
Once the App Designer opens, you’ll see the current app layout and its structure on the left-hand side. This interactive view lets you preview your updates in real time.
The left navigation shows each area, section, and subarea. Below it, the All Other Pages list displays every table, view, and dashboard in your app—even those not visible in navigation.
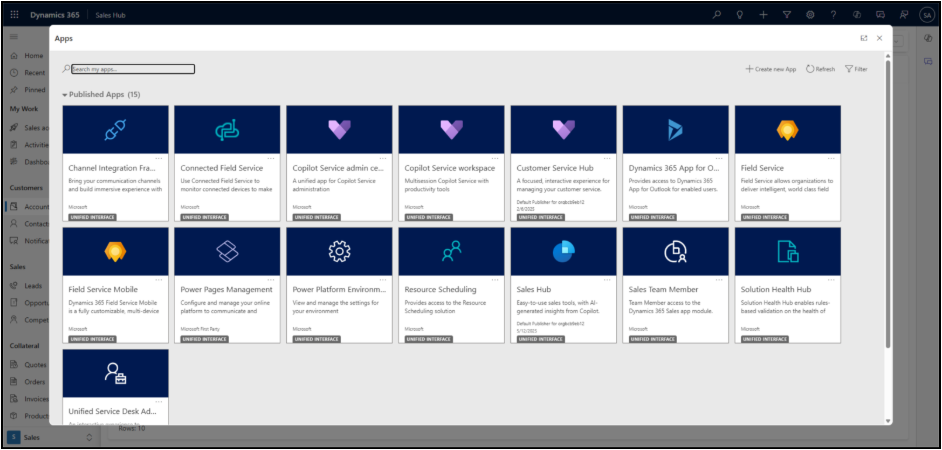
Find the model-driven app you wish to edit, click the ellipsis (…) next to it, and choose Open in App Designer. This option will only be available to users with System Administrator or System Customizer privileges.
Once you begin editing, this will make changes to only this particular app. If you wish to make similar changes to a different app, the changes must then be separately replicated within the other app.
Once the app designer loads, you will see a view of how your app currently looks, along with its structure laid out on the left-hand side. The internal view is clickable, so that you can move around to preview your changes in real-time.
Decluttering Your CRM App
Too many default views or forms cluttering your workspace? Here’s how to remove what you don’t need:
- Locate the table either under Navigation or in All Other Pages.
- Select the table’s Views or Forms option.
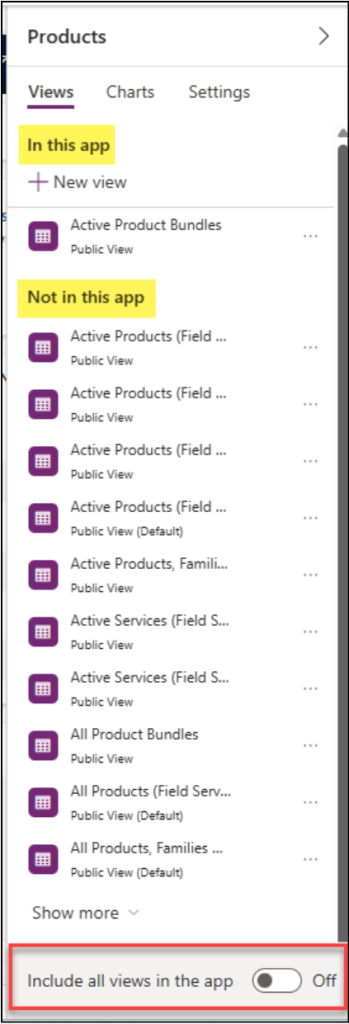
- In the right-hand panel, review all available items. Turn off Include all views in the app if you only want specific ones visible.
⚠️ Warning: Turning this off removes all views except the first one listed, but you can manually add back the ones you need.
To add or remove specific views, click the ellipsis (…) beside the view name and select Add or Remove.
When done, Save and Publish your app to apply the changes.
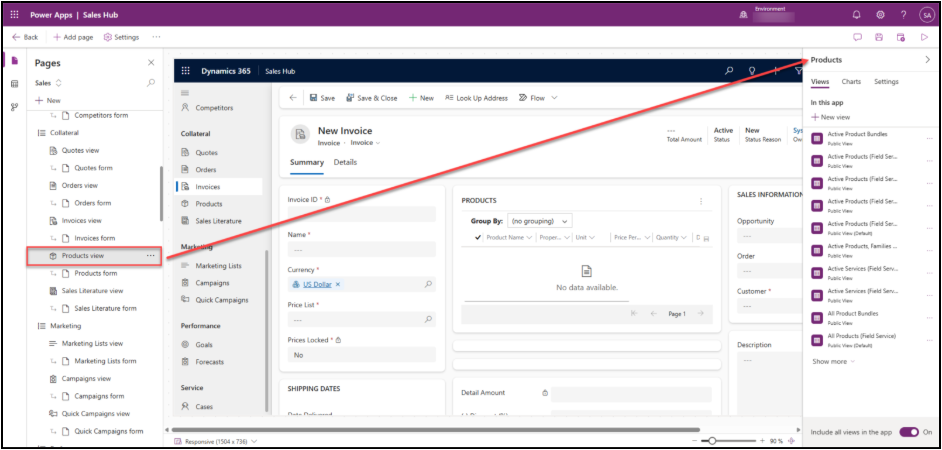
In this current list of Product views, the option to Include all views in the app is turned on. This means that all base Microsoft views, and any new custom (public) views will automatically appear in the main Product list view for all staff.
If you wish to remove some of these views from the app so that only the ones you use or need are listed, turn this setting off. Note that when you do this, it will warn you that it will automatically remove all views except for the first one listed. You can then individually add back in the views that you need.
To add or remove views from the app, find the one you want to update, click the ellipsis next to its name, and select either Add or Remove.
Adding Custom Tables to Your CRM App
Created a new table but can’t see it in Advanced Find? It probably isn’t part of your app yet.
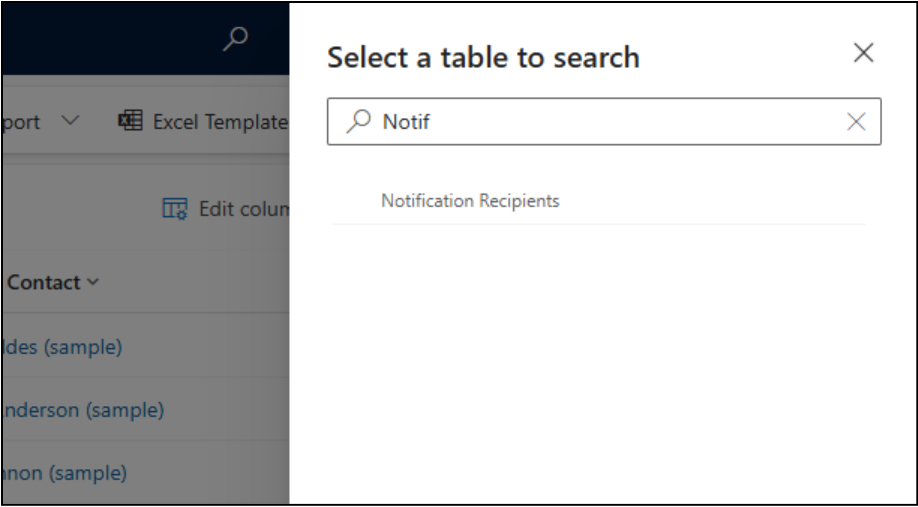
For example, imagine you built a custom table called Notification Recipients related to Contacts and Accounts. To make it visible:
- Open the App Designer.
- Click + New → Dataverse Table.
- Search for your new table.
- Check or uncheck Show in Navigation depending on whether you want it visible in your app menu.
- Click Add, then Save and Publish your changes.
After refreshing your CRM, the new table will appear as an option in Advanced Find.
Additional Tips for CRM Optimization
- Take it slow. Avoid removing too many views or forms at once. Make sure nothing you remove is used in subgrids or embedded forms.
- Refresh often. If you don’t see changes right away after publishing, refresh your browser window to reload the updated configuration.
- Document your changes. Keeping a quick log helps if multiple admins work in the same environment.
- For more detailed Microsoft documentation, see Customize model-driven apps in Power Apps.
- Want to learn how to build your own tables and relationships? Read our internal post on Creating Custom Tables in Microsoft Dataverse.
Simplify Your CRM Experience
When you declutter and personalize your CRM app, you reduce distractions and focus on the data that matters most. With just a few adjustments in the App Designer, your team can enjoy a cleaner, faster, and more intuitive CRM workspace.