Written By Cheryl Shepard
Connecting bank feeds or importing bank statements in Business Central is essential for accurate cash flow management and efficient bank reconciliations. Whether you use live feeds through Yodlee or Envestnet, or manually import CAMT.053, OFX, or CSV files, proper setup ensures smooth daily operations and faster month-end close.
Below is a step-by-step guide to setting up bank feeds and importing statements in Business Central.
1. Set Up Yodlee or Envestnet Bank Feeds in Business Central
To connect bank feeds in Business Central:
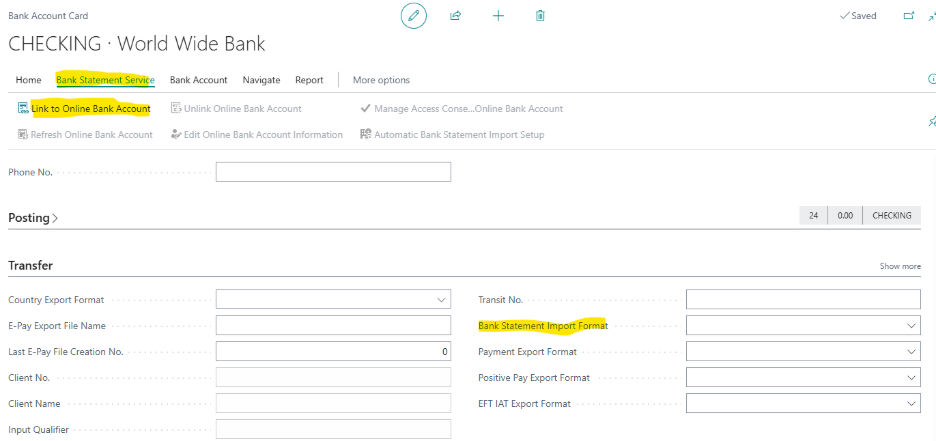
- Open Bank Account Card (search “Bank Account” in the Tell Me box).
- Under Bank Account, locate Bank Feed Setup.
- Enable the bank feed service.
- Enter your credentials or API token from Yodlee or Envestnet.
- Click Test Connection to confirm it works.
- Save and close.
Once connected, transactions sync automatically based on the provider’s schedule.
Note: If your bank is not supported, you must use manual bank statement import.
2. Import CAMT.053, OFX, or CSV Bank Statements
If you are not using a live bank feed, you can manually import statements.
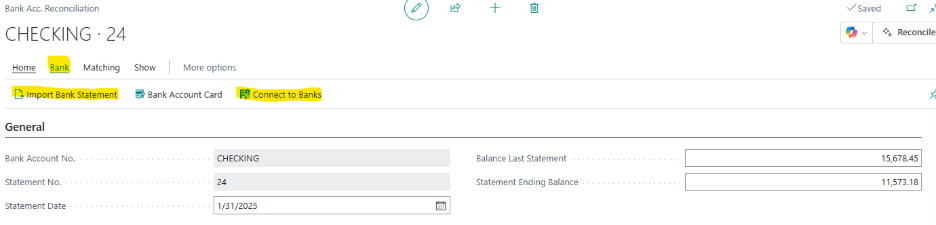
- Open the Bank Account Reconciliation page.
- Click Import Statement.
- Select your file format:
- CAMT.053 (XML)
- OFX
- CSV
- Upload the file.
- Review imported transactions.
This method works well for banks that do not integrate directly.
3. Map CSV Files for Repeatable Bank Statement Imports
CSV files require one-time mapping:
- During your first import, Business Central prompts you to map columns (Date, Amount, Description).
- Match your CSV columns to Business Central fields.
- Save the mapping as a template.
Next time, simply select the template — no remapping needed.
This reduces errors and saves significant time.
4. Automate and Schedule Bank Statement Imports
- Bank feeds update automatically.
- For file imports, consider automation using tools like Power Automate to download and import statements on a schedule.
Automation reduces manual handling and keeps financial data current.
Bank Reconciliation in Business Central: Finish Faster and Handle Exceptions
Efficient bank reconciliation helps close your month faster while keeping financial records accurate.
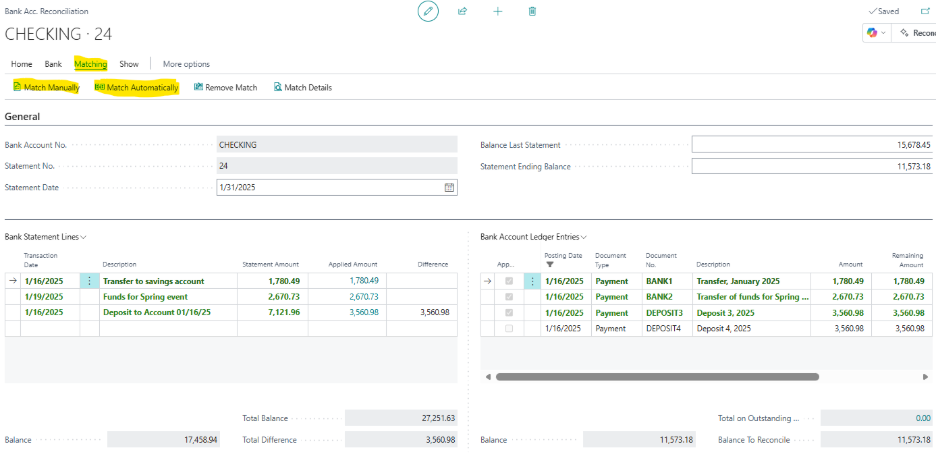
1. Use Auto Match Rules
Auto Match Rules automatically match transactions based on:
- Amount
- Date
- Description
When criteria match, Business Central links bank statement lines to ledger entries automatically.
Pro Tip: Avoid overly strict rules. Adjust tolerances to improve match rates.
2. Manual Matching for Unmatched Transactions
For transactions that don’t auto-match:
- Open Bank Account Reconciliation
- Manually link entries
- Split lines
- Apply partial matches
Manual matching handles timing differences and unusual transactions.
3. Handle Bank Fees Properly
Bank fees often appear as separate statement lines.
- Post fees to a dedicated Bank Fees G/L account
- Configure this in your Bank Account setup
This ensures accurate expense tracking and cash position reporting.
4. Manage Transfers Between Bank Accounts
When transferring funds:
- Record a payment from one bank
- Record a receipt in the other
- Match both sides during reconciliation
This prevents reconciliation discrepancies and maintains audit clarity.
5. Handle Multi-Currency Differences
Exchange rate fluctuations can cause small variances.
Business Central automatically posts gains or losses to designated G/L accounts.
To minimize issues:
- Regularly update exchange rates
- Review discrepancy reports
Troubleshooting & Quick Tips
Decimal inconsistencies
Validate file format before importing.
Keep bank feed credentials updated.
Use Bank Statement Import Log to diagnose errors.