Written By Jerome Stewart
Introduction to Power Automate/Flows
Power Automate is a low-code/no-code automation platform that integrates seamlessly with Dataverse, enabling users to create Flows that enhance productivity and reduce manual effort. This platform essentially replaces and enhances the functionality of classic Workflows in earlier CRM versions.
Triggers are the initial, and foundational, component of Power Automate flows. They determine the starting point of a flow, listening for specific events or changes in Dataverse in order to determine when specific actions should occur.
Types of Power Automate Flow Triggers for Dataverse
Power Automate offers a variety of trigger types for integrating with Dataverse. Here, we are going to delve into the two most common triggers: “When a Row is Added, Modified, or Deleted”, and “Recurrence.”
1. When a Row is Added, Modified, or Deleted
This trigger initiates a flow whenever a row in a specific Dataverse table is added, updated, or deleted. It is highly versatile and is commonly used in scenarios such as:
- Sending email notifications when a new record is created or updated to a specific value.
- Updating related records when specific fields are modified.
- Performing clean-up actions when a record is deleted.
This trigger is the corollary to all of the potential trigger options available in the Classic Workflow model.
Example Use Case: A Service Technician wants to receive an email notification whenever an Inventory Transfer Request is made by someone requesting a part from their Warehouse. Using this trigger, a flow can be set up to send an automated notification with the details of the Inventory Transfer to the technician the part is being requested from.
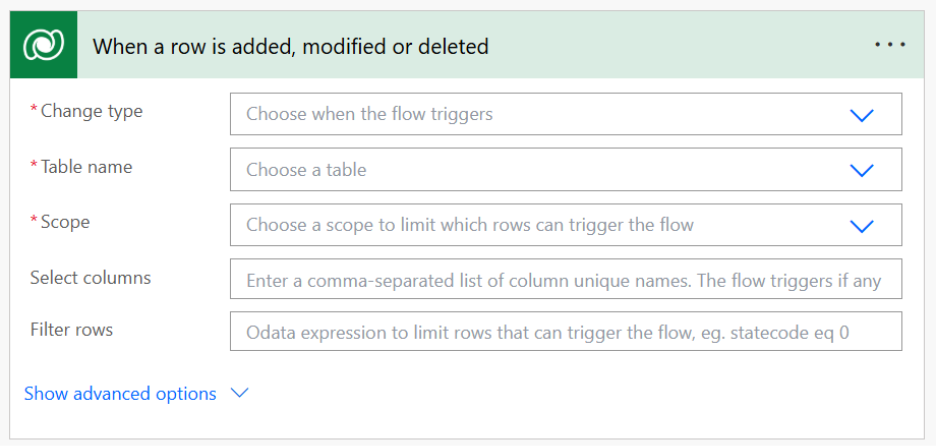
Trigger Options:
Change Type allows you to control what specific record alteration will cause the flow to fire:
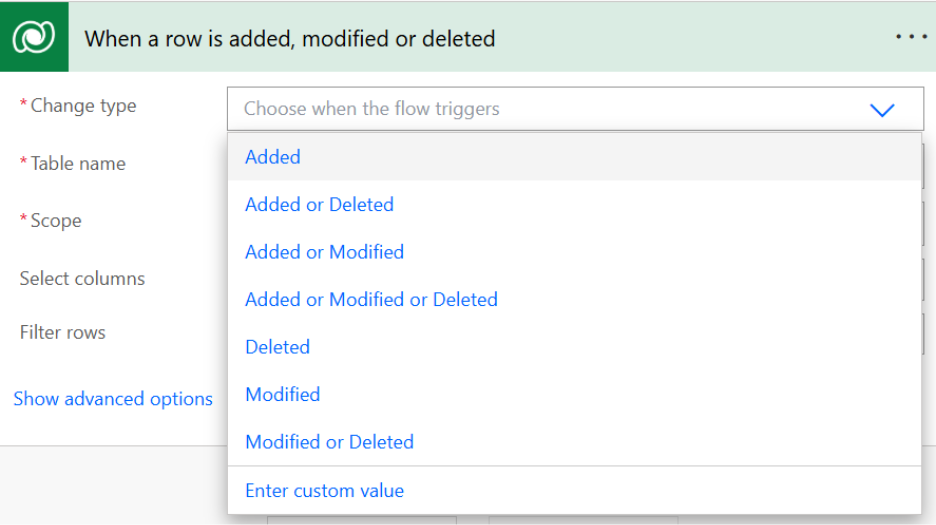
Added: When a new record is created
Modified: When an existing record is updated
Deleted: When an existing record is deleted
You then can choose between these options for a combination of different triggers. For Example: Choosing Added or Modified will allow you to set the flow to trigger whenever the record is either newly Created, or an existing record is modified.
Table Name allows you to select the specific Table this trigger is applicable to. It is important to determine what table is the root trigger for the logic to run, and base the flow on the table that makes the most sense:
Scope allows you to determine which records/rows are eligible to trigger the flow based on a standpoint of Ownership. The options available in order from most to least strict scope are User, Business Unit, Parent: Child business unit, and Organization.
Select Columns is a comma separated list of column schema names that can trigger the flow. This option is only applicable to a Change Type that includes Modified. This allows you to specify what column changes will trigger the flow, as opposed to just any update to an existing record.
An example of this would be if you wanted a flow to trigger upon status change of a Work Order, you would write in the schema name of the status field “msdyn_systemstatus” into this box.
Filter rows allows you to write an Odata expression that will limit the runs of the flow based on specific criteria. This filtering option is crucial as it allows you to control the scope of the Flow’s triggers onto just the exact conditions in which it should fire. This helps improve how often the flow runs and will help maintain system resources and overall API calls:
An example of an Odata expression given in the tooltip of the box itself is statecode eq 0, or status equals Active. This structure can be utilized to make more complex conditional groupings if necessary. If one has access to XRM Toolbox, it is recommended to use the Fetch XML Builder tool available in that application. This tool has a feature that allows you to convert a Fetch XML Query directly into Power Automate Parameters. You can also copy and paste the Fetch XML of an Existing Advanced Find record into the Fetch XML Builder to use that as the foundation:
The resulting conversion will have a copiable filter section that will give you the Fetch XML Query Filters in Odata format:
Delay Until allows you to postpone the trigger evaluation of the flow until a future date and time:
Lastly, Run As allows you to choose if the flow will fire as if the Owner of the Flow is making modifications, the user that Modified the record is making changes, or the owner of the record is making changes:
Depending on your structure, you may want to alter the Run As best according to your needs. If flows in a system are typically owned by an administrative user record, it may help to retain the Flow Owner as the invoker as it will help make it clear in the Audit Logs as to what exactly caused record updates.
2. Recurrence Triggers
Recurrence triggers allow flows to run on a specified schedule (e.g., daily, weekly, or monthly). While this is not specific to Dataverse, it can interact with Dataverse data to perform periodic tasks.
Example Use Case: A marketing team wants to generate weekly reports summarizing customer interactions. A flow with a recurrence trigger can query the Dataverse data, compile it into an HTML table, and send the report via email to a distribution group.
The settings options available for a Recurrence based Flow allow you to control the repetition based on Second, Minute, Hour, Day, Week, or Month, with a numerical control for how many of the selected time intervals you want them separately by.
Best Practices for Using Triggers with Dataverse
To maximize the efficiency and reliability of Power Automate flows with Dataverse, consider the following best practices:
- Limit Scope: Use filters to limit the scope of triggers to relevant rows and events. This minimizes unnecessary flow runs. Another aspect of this is determining whether there is the potential to combine different Flows if they have similar conditions to trigger. For example: If an email needs to be sent upon creation of an Inventory Transfer record, and that same record needs to have fields updated to specific values (such as timestamping the date of request), then it may be beneficial to have all of the logic organized into a singular Flow so that two Flows do not run simultaneously for the same trigger event.
- Optimize Performance: Avoid creating overly complex flows that might impact performance. Break larger workflows into smaller, manageable steps if possible. There should be a balance between the scope of the trigger conditions and the overall length/runtime of the flow(s).
- Monitor and Audit: Leverage Power Automate’s monitoring tools to track flow performance and troubleshoot issues promptly. These tools include the existing monitoring tools within the power apps platform, as well as emails that can be sent to the owner of the flow to notify them of specific failures.
Conclusion: Harnessing the Power of Automation
The integration of Power Automate with Microsoft Dataverse opens a world of possibilities for streamlining and automating business processes. By selecting the right trigger type, users can design workflows that cater to a wide variety of scenarios, from simple notifications to complex system integrations.
With the flexibility of Power Automate and the robust capabilities of Dataverse, the potential for automation is virtually limitless. Dive into these triggers, experiment with their functionality, and unlock the full potential of Microsoft Dynamics 365 for your organization.